|
FITTING
INSTRUCTIONS 90/110 LT77 GEAR BOX.
Thank you
for purchasing the acoustic mats system from Wright Off Road. You will
need;
IMPORTANT: DO NOT CREASE YOUR MAT. The Mat
system is designed to replace all the existing trim in the areas it
covers. But in later models the standard trim, in the bulkhead and
foot wells is quite extensive, although it is not as affective as
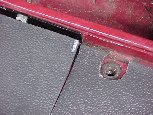
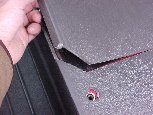
the Polyurethane (PU) system. BULKHEAD MAT. The Bulkhead mat should be fitted first. On the reverse of the mat you will find recessed locations for the Air conditioning pipes if required. You will need to remove the fuse box cover and the fuse box retaining screws. Feed the mat behind the wiring and place against the bulkhead then re-fix the fuse box. It does not require gluing, as it is self-supporting. Leave the cover off until the floor mat is fitted. SEAT BOX MAT. The Seat box should be fitted secondly. It is supplied as a blank, and requires cutting to suit your requirements. It will give the best acoustic properties if it is fitted as it is but you may require access to the seat box panels. You will also need to remove the seats, handbrake lever and gaiter. On the underside of the mat you will find a number of witness marks that correspond to the features of the seat box. The handbrake can be fitted on top of the mat or through it. The marks are present for either left or right hand drive. (The smaller recess represents the handbrake lever, the larger is provides clearance for the other hand cover plate.) The transmission tunnel opening will also require cutting to the shape of the recess provided along with the middle seat channel. Any cutting should be done with a Stanley/heavy duty craft knife, make sure you use a new blade and you have a supply of new blades as you will need to replace it shortly. As the mat is so dense, it will blunt blades quickly. Also use oil to lubricate the blade, the oil will not affect the mat. PLEASE BE CAREFUL, USE A STEEL STRAIGHT EDGE TO CUT AGAINST. Best method is to cut through in two or three passes. If you have an untidy cut edge you can sand it with a medium/fine grade paper. The seat box lids can be cut in the same way and using the witness marks as a guide. Seat fixing holes are also marked, select the required ones and drill. (Make sure you are using the correct ones, Land Rover modified the seat box around the introduction of the 200Tdi and moved the seat fixings by about an inch in board. We suggest that you position the mat on the seat box and mark through from underneath the seat and handbrake fixing holes to double check positions, then move it forward to expose the lids and seat fixing holes. These positions can then be transferred to the mat)
Use the lid as a template to cut around.
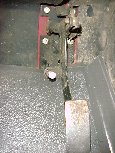
Its up to you how you cut the panels, The cut piece can be left attached with a hinge, fixed to the lid or lifted out when access is required. You could also remove all the hasps. The seat frame/runners can then be bolted down on top of the mat, use locking nuts and don’t over tighten, as the mat will deform excessively. Make sure the seat slide rail works and engages properly. Use the existing spacers or super glue a stack of washers together. Depending on the seats you are using, you may need to cut a lid panel to allow the seat to be fixed. FLOOR MAT. The floor mat should be fitted last. . Firstly remove the gear lever gaiter, a new cable tie is supplied. You will need the piece of foam that goes under the gaiter. It provides the sound deadening for the top of the gearbox. You can treat the floor area to rust proofing if you are concerned about trapped water. Wax oil is probably the best and can now be used on the inside floor area under the mat. Lower the mat over the gear lever, angled downwards at the front. Aim the leading edge under the pedals and feed the gear lever through hole. Make sure the leading edge of the mat is pointing upwards towards the fuse box. MAKE SURE THE PEDALS HAVE FULL RANGE OF TRAVEL AND DON’T FOUL THE MAT SYSTEM.
Refit the gearlever gaiter using the new cable tie. Refit the handbrake and gaiter. Refit the fuse box cover. CLEANING The Mat
system will be covered in a light mould release agent. |